Did you know YouTube Shorts receive 6 million views every second of every day?
Whether it’s a sales explainer highlighting a popular feature of a product, or an art therapy piece of content on Instagram, everyone loves a good video.
However, with new and rapid advancements in technology, consumers also have higher expectations of content from content creators and businesses.
A blurry, old-school, boring video isn’t going to cut it anymore.
If you want a slice of that 6 million video views pie, you need to create a good video - one that stops your viewers in their tracks and makes them click the play button. One that converts them into customers.
A well-shot video has the power to convert, capture customers’ attraction, and create awareness about your company.
This article will serve as a complete guide to creating a professional video, from what equipment to get, to shooting your content and editing your video.
What basic equipment and software requirements should you look for?
When you’re just starting out, you don’t need fancy equipment. A good iPhone camera can create a wonderful, professional looking video, too.
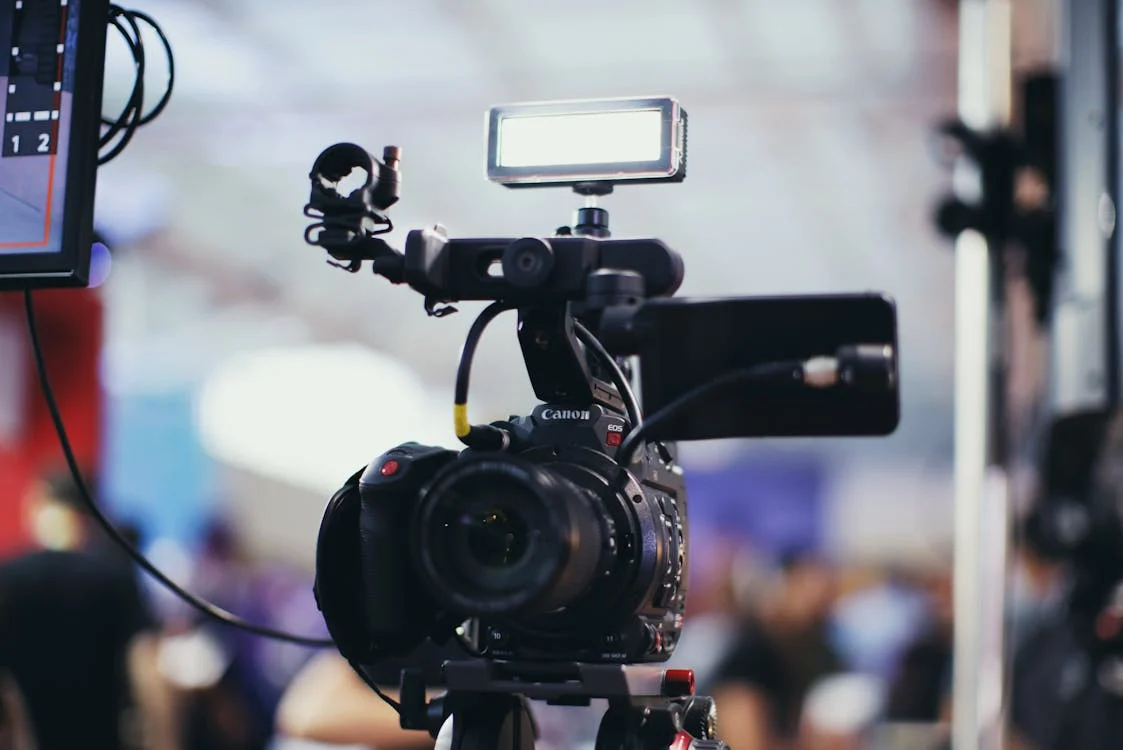
However, if you’d like to invest in a good camera, go for either a DSLR (Nikon D3500 is a great option) or a mirrorless camera (like Canon EOS R10).
Next, is good lighting and audio. Lighting and audio can make or break your videos. Here are a few excellent options you can look into if you’re just starting out,
And finally an editing software. From the easiest platform PlayPlay to Adobe Premiere Pro, there are a ton of excellent editing softwares you can use to professionally edit your videos.
Step 1: Determining your video's purpose
You’ve decided you want to create a professional looking video for your business. What’s the first step?
Figuring out your why.
Why do you want to create it?
Who is it for?
What pain points are you solving?
What goals is it going to achieve?
How long will the campaign go on for?
Let’s dive deep into this.
Defining your target audience
A video for a gen Z audience is going to be vastly different from one for boomers. And a financial director will be looking for a different type of content to a social media manager.
For your video to really resonate with your core audience and convert them, you need to go beyond the simple demographics like age, location, and gender.
Find out about their hobbies and interests, likes, dislikes, and who they are influenced by; pretty much everything you can get your hands on.
Create an in-depth viewer’s persona.
If you have an existing customer base, ask your customer facing teams for insights, run surveys, send them emails with incentives and ask them their preferences.
Comb through Reddit and Facebook groups to really understand your audience’s fears and wants.
Setting clear objectives
Think to yourself, what is the purpose of this video?
Do I want to create content that educates my audience?
Do I want more sales and conversions through my website?
What KPIs do I want to track? Watch time, play-rate, audience retention or click through rates?
How much budget do I have for this video campaign? What is the deadline?
You need to have a clear picture of your objectives and what you want to gain from the video.
Choosing the right video type
From YouTube Shorts to LinkedIn Live videos and long vlogs, there is a plethora of different video types to choose from. Each video type caters to a different audience, fulfills a different business goal, and gives a different result, so this step is crucial during your video creation process.
How do you decide the right video type for your campaign?
Start with the purpose and goal of your video.
If your video is about the opening of a new outlet, then a vlog on YouTube might get you great results. A couple of shorter time-lapse videos would work great too on TikTok and Instagram. Like Warby Parker’s Instagram Reel.
If it is about a newly launched product, then a series of short tutorials and product feature videos is the best way to go.
Next, choose the social platform you’d like to publish these videos.
If TikTok and Instagram is where your audience is at, then short and fun content is the way to go.
If you’re building your audience on YouTube, then you need to focus on YouTube Shorts and YouTube’s longer videos (like in-depth tutorials, advertisement videos, vlogs).
And if you’re in the B2B niche, then educational videos for LinkedIn is the way to go. Here’s a great example of how Buffer creates short educational video content for LinkedIn.
Step 2: Pre-production: Planning Your video
Time to start shooting the video. Right?
Wrong.
You cannot simply start shooting the video without first conceptualizing and planning it.
Here’s what you need to do next.
Planning and scripting
Whether you’re creating an event recap video, executive interview video or a product tutorial, you need to plan it prior to shooting it.
Here’s how you can do that.
Storyboarding and conceptualizing
Storyboarding is a great way to conceptualize your video as it will help you understand how the entire video will pan out.
Creating a product feature video?
Start by describing the video.
What are the specific features or benefits you want to highlight?
What kind of video would you like it to be (a storytelling video, a simple product feature video, or a viral-worthy TikTok video)?
Here’s a great example of a simple storyboard by ThreeBox Communication.
Script
Visuals
Sally: "I love taking long walks with my dog."
The scene opens with Sally walking down the street with her dog on a leash. as she is walking, she is talking.
FOOTAGE: Continuous of Sally walking down a neighborhood street with her dog.
ANIMATION: Transition graphic.
Writing it’s script
To write a script for a video, you need to know:
Who is your audience? Be very specific here.
Where is your target audience in the buying process (problem recognition, information search, evaluating alternatives, etc.)?
What action should the viewer take after the video? Do you want to send them to your website or your social platforms? Do you want them to sign up for your newsletter or purchase your product?
What problem are you solving and how?
Once you have all the basics, start writing a simple script. You can add on details once you start shooting, but when starting out, begin with a simple script and storyline.
Creating a shot list
A shot list is a map of sorts.
What will happen in each scene? Which actors are needed in different scenes? What equipment is required? And so on. Add details like technical specifications for each shot and camera angles, too.
Next, plan transitions. Decide how one shot is going to flow seamlessly into the other.
Selecting locations and preparing for shooting
Selecting the right location and props is crucial to creating a good video.
Choose the right location for your video
The location of your shoot should reflect the theme of your video.
If you’re introducing your new physical outlet, shooting it in the same area and inside the outlet will be ideal.
Similarly, if you’re shooting a simple product feature video, a room in your office/studio should suffice.
Some high-budget videos require very specific outdoor locations, with multiple shots being shot in different places.
So choose the location wisely.
Gather everyone and everything before you start shooting
Gather all the necessary equipment before you begin working.
This is where conceptualizing, storyboarding, and scripting will help. If you do these beforehand, you will already have a good understanding of all the props, equipment (audio, lightning, etc), and even the people you may need for the video.
Consider lighting and sound requirements
Does the location you’ve selected contain adequate lighting for the shoot or will you need to bring in extra lights?
Similarly, is it a crowded area? Would you require an external mic or would an internal mic of your camera suffice?
Step 3: Production: Shooting your video
Finally on to the best part - shooting the video.
Setting up your shoot
Start off the process by setting up your shoot to perfection.
Camera setup and framing
Firstly, choose the right camera for your video - if you need attention to detail and excellent quality videos, mirrorless cameras or DSLRs are preferred. For simpler videos, smartphones can perform a pretty decent job, as well.
Here are some terms you should be familiar with when aiming to shoot a decent video:
ISO: your camera’s sensitivity to light. High ISO means high exposure but at the risk of turning your film grainy. It is best to have a low ISO to avoid grainy/mushy videography.
Shutter speed: Shutter speed measures how quickly the camera exposes a frame to light. It affects exposure. It is a general practice to have the shutter speed as double as FPS.
FPS: FPS is frames per second. For a slo-mo video 60 fps works best whereas for something more cinematic, 24 fps will do well.
Framing the video is also essential.
For framing, utilize the rule of thirds, leading lines, depth of field, etc.
Lighting techniques
Lighting is everything in the world of videos.
Experiment with different types of lighting to see what works best for your video type. Natural lighting, especially the “golden hour” (an hour before the sun sets) remains an unbeatable source of excellent lighting.
But you can also use other lighting, such as three-point lighting setups, LED lights and ring lights to achieve your desired look in the video.
Recording audio
If you are shooting a simple video with your smartphone and the background noise is minimal, the built-in mic should be enough. But if you want the audio to be a focal point in your video, invest in a good-quality microphone.
Lapel mics work great for interviews, vlogs, and Live videos. Shotgun mics can be used to record audio from a distance and they’re also great at reducing ambient noise.
Tip: If you are in an area with a lot of wind disturbance, placing a mic windshield or foam cover over your microphone can help significantly reduce it.
Capturing engaging footage
To create great footage, you need to determine which filming techniques you’re going to use, make sure your actors are prepped and can confidently perform in front of the camera, and ensure that you capture the same high-quality footage for all your videos.
Filming techniques and angles
Keeping the following techniques and angles in mind can help you create a great professional looking video for your business.
Composition
Give attention to how different elements are arranged within the frame. The more balanced and aligned they are, the better your video will look.
Rule of thirds, leading lines, frame within a frame, color composition and stop motion are just a few filming techniques that can help you create a variety of business videos.
Here’s a super simple example of a stop-motion video you can create for your business.
Movement
Adding movement adds oomph to the video and makes it easy to capture your audience’s attention.
Tilting, panning, and zooming in and out, are all different ways you can play around with movement.
Variety of shots
Infusing a variety of shots helps to add depth to your video. For instance, you can use close-up shots to create a feel of intimacy, wide shots to show context.
Here’s a great example of using movement and different shots to create an interesting, event recap video.
Angles
From eye level to high level, there are a lot of different angles you can experiment with.
Want your product to look huge and powerful? Try shooting from a low angle.
Want to show the sheer amount of attendees that attended your event? Shoot from a bird's eye angle.
Experimenting with different angles can help you create fun videos and help you break free from your comfort zone, too. Like this LinkedIn video by Ving Giang, International keynote speaker.
Time for some b-roll
B-roll is extra footage that you capture during the video shooting process which helps to enhance your actual footage.
Mishaps can be turned into funny GIFs, b-roll with things going wrong can be turned into a funny ‘10 things that can go wrong’ kind of videos, and b-roll can also be used to turn a simple video into a really great one.
Tip: Have an extra camera person on standby whose only job is to capture b-roll.
Working with actors
Whether you’re creating testimonial videos, interviews or working on user-generated videos to create the best commercial ads or content campaigns, you need people who are convincing, engaging, and confident in front of the camera.
You don’t always need professional actors; using employees and regular people is actually a great way of connecting with your audience. But you need to train them to be confident in front of the camera and also engage with the audience.
Here are a few ways you can do that.
Foster an environment of collaboration. Give them a loose script of what they need to say and the context of the video, but let them add their own input too.
Use a teleprompter to help actors remember their lines.
Give actors time for rehearsal and be prepared to take multiple takes. Timing of delivery is crucial, so it can take a few takes to get that right.
If your audience is diverse, consider using actors that represent diversity.
Non verbal communication is as important as verbal, so train actors in the art of body language.
And lastly, make sure you collaborate with people who are relevant and aligned with your brand’s message. For instance, an actress who has never played football in her life should not be asked to star in a video about football studs.
Step 4: Post-production: Editing your video
It’s time to upload all that footage on your editing software and start slicing, color-grading, trimming, and editing the video.
Or as they say, time to be a little wild.
How to start your video editing process?
Import and organize footage
Open your video editor and import all the footage (including all your b-roll). Now, organize your footage according to your storyboard and script. Remove any shots and footage that you don’t need in this particular video.
Choose the right editing software for your needs
Most editing softwares have more or less the same features available. Some of the editing features you need to look out for when choosing a video editor are,
Helps you organize your clips
A great editing software will allow you to maintain a media library where you can import or even create clips, videos, images, etc. It offers organization tools like tabs, labels, and folders.
Lets you play around with the audio
You can choose to keep the original audio, adjust its volume, or mute it and add some other sound effects or a voiceover.
Allows you to add overlays
Choose an editing software that lets you add text and filters to your clips. This adds oomph to your video.
It’s easy to use
Some of the best professional editing softwares like Adobe Premiere Pro are complicated to use. If you’re looking for an editing softwares that offers professional tools and features but is also easy to use and learn, there are plenty of great options like PlayPlay.
Cutting, trimming, and arranging clips is a breeze
The most essential feature of an editing software is that it allows you to cut, trim, and arrange clips.
And since we’re in the era of artificial intelligence, with the help of AI powered editing tools you can split a clip, trim it, or translate the video automatically.
Enhance your video’s quality
You’ve shot the video and just realized that your shots are not bright enough. Maybe the audio is a little unclear? Whatever it is, you can fix it in post-production.
In post-production and with a great video editor, you can easily turn raw footage into an excellent video by adding transitions, fixing video quality, and adding the right audio.
Adding Transitions
If you want one shot to flow seamlessly into another, use transitions. Nothing too dramatic like a shot flying in from the right - something as simple as a Fade In and Fade Out can also add a lot of sophistication to your video.
Incorporating the right audio
Audio can make or break your video. This is probably why creators are now creating videos based on trending audios on Instagram Reel and TikTok. Not only are these audios entertaining for your audience but they also have the potential to make your social media video viral.
Voiceovers are another great way to add audio to your videos.
PlayPlay offers a vast library of popular royalty-free audios you can easily add to your videos, too.
Subtitles
Not everyone in your target audience will watch your video with the audio turned on, so adding subtitles to your videos is essential.
A recent study showed that 80% of viewers are more likely to finish a video with subtitles.
Step 5: Distribution and engagement
You’ve shot the video, edited it to perfection, now it’s time to show it to the world. Distribution and marketing teams now need to give it their best to make sure it reaches maximum people.
Here’s how they can do that.
Share your video across all the platforms
Think you can only embed your video on your website or add it to your blog posts?
Think again.
Video can be shared across a plethora of social and video platforms to maximize your reach.
Consider video hosting platforms like Vimeo and YouTube
While YouTube racks up billions of views everyday, Vimeo has a very active user base that even pays for subscriptions. YouTube and Vimeo are two giants in the world of video hosting so consider both the hosting platforms when uploading your video.
Some things to keep in mind before uploading your video to YouTube or Vimeo,
Next is the resolution. Start at the standard which is 1080p.
Lastly, ensure that your video has a catchy title, an irresistible thumbnail, and a great caption that instantly lures in your audience.
Optimize for SEO
Let’s assume you have a YouTube channel dedicated to antique watches and want to show up on top when someone searches for them. How are you going to do it?
Keywords.
Using tools like Ahrefs and Google Keyword Planner, make a list of keywords centered around your key topic and incorporate them into your content (video title, description, and tags) for better visibility on Google and social search engines.
Tip: Provide transcripts and closed captions for better accessibility.
Promote your video on Social Media
Lastly, promote your video on social media (afterall,the combined user base of all social platforms is a whopping 5 billion - over 65% of the world population).
Generate hype around the video before launching by giving teasers and trailers of the best bits of the video, encouraging the audience to watch it when it launches.
Use paid advertisements and collaborate with micro and macro influencers to promote the video.
Cross promote the video on all your social channels.
Step 6 : Engaging with your audience and testing your video
Your video is uploaded on video hosting and social platforms. Everything’s going well. You’re garnering views and lots of eyeballs.
Now it’s time to engage with your audience and turn cold relationships into warm ones.
Respond to Comments and Feedback
Want to increase engagement and views on your video?
Start engaging on the video.
Respond to comments and feedback positively. Show the audience that you appreciate and value their opinions and are willing to work on your shortcomings.
Analyze Video Analytics
Insights from video analytics are essential tools to understand the performance of your videos. Metrics like average watch time, engagement rate, click-through rates, and demographics help you understand which content is working and which isn't.
So keep a close eye on all your video analytics.
Iterate for Improvement
Found your views aren’t high enough?
Start an inorganic ad campaign to promote your video.
Notice your watch time is hardly a second?
Time to edit the video and add more interactive elements in it.
The more you test your video and analyze its analytics, the more chances you have to improve its performance.
Wrapping up
A good camera, a good idea, and a good video editor can help you create a viral-worthy video.
All you need to do?
Start creating videos for your business ASAP.
With just a few good videos, you’ll see a dramatic shift in your views, your conversions, and your engagement.